How to Get a Dog Urine Sample: Stress-Free Methods That Actually Work
Quick Answer: The easiest way to get a urine sample from most dogs is the “free-catch” method — using a clean, shallow container like a soup ladle, a disposable aluminum pie plate, or a dedicated urine collection tray to catch urine mid-stream while your dog urinates outdoors. For female dogs, a shallow tray slid underneath just as they squat works well. For male dogs, a ladle or cup held into the stream is effective. The sample should be collected in a clean, dry container, refrigerated if not delivered to the vet within an hour, and ideally collected first thing in the morning when urine is most concentrated.
Your veterinarian just asked you to bring in a urine sample from your dog. You nodded. Then you walked out of the clinic and realized you have absolutely no idea how to actually do that. Your dog is not going to pee in a cup on command. You search “how to get dog urine sample” hoping for a method that does not involve chasing your dog around the yard with a Tupperware container while your neighbors watch from their window.
The good news: collecting a urine sample from a dog is awkward the first time and completely manageable every time after that. Thousands of owners do it every day. You just need the right container, the right technique for your dog’s size and sex, and a few practical tips that make the difference between a clean sample and a frustrating mess. This guide covers all three methods — free-catch, tray collection, and cystocentesis — plus storage, timing, and exactly what to avoid.
Why Your Veterinarian Needs a Urine Sample
A urinalysis is one of the most valuable diagnostic tools in veterinary medicine. From a few milliliters of urine, your veterinarian can screen for urinary tract infections, bladder stones, kidney disease, diabetes, liver problems, and a range of metabolic conditions. It is non-invasive for the dog — no needles, no sedation — and the information it provides often shapes the entire diagnostic and treatment plan.
The quality of the sample directly affects the accuracy of the results. A contaminated sample — one that sat on the grass, picked up bacteria from the floor, or was collected in a container that was not clean — can produce false positives for infection or misleading cell counts. Learning how to collect a clean, mid-stream sample at home saves you a return trip to the clinic and gives your veterinarian reliable data to work with on the first try.

The Free-Catch Method: Step-by-Step for Male and Female Dogs
The free-catch method is exactly what it sounds like: catching urine in a clean container while your dog urinates naturally. No restraint. No invasive tools. Just timing, patience, and the right equipment. This is the method most veterinarians recommend for at-home collection because it is low-stress for the dog and produces a sample that has not been contaminated by contact with surfaces.
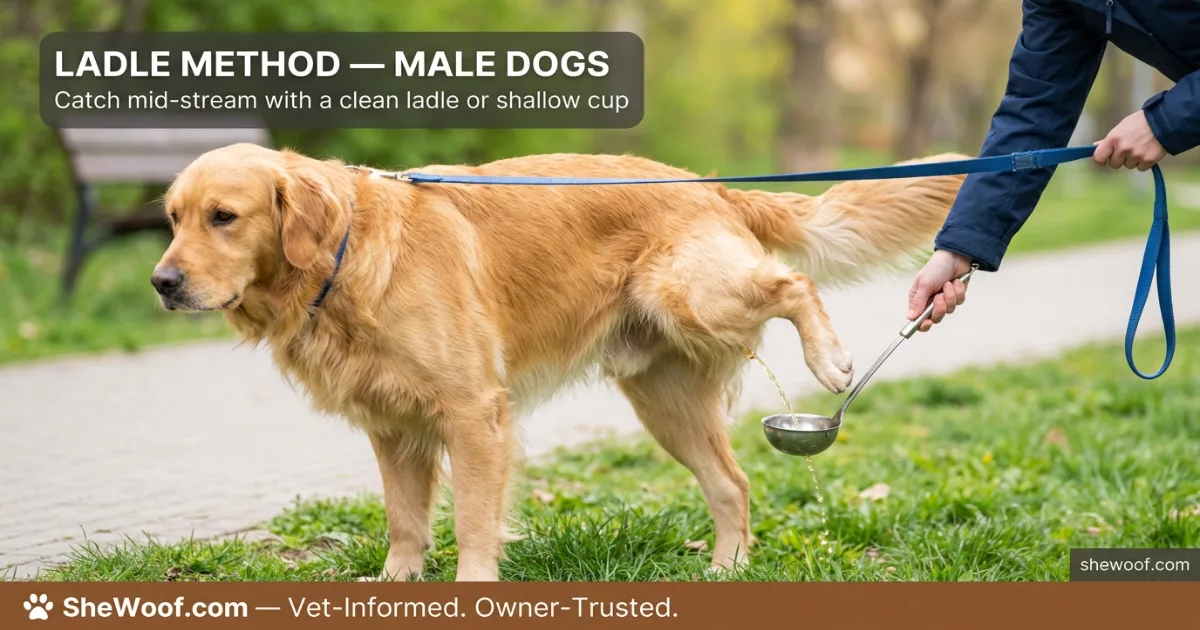
For male dogs: The process is relatively straightforward. Use a clean soup ladle, a shallow disposable aluminum pie plate, or a wide-mouthed plastic container with a handle. Walk your dog on a leash to their usual urination spot. When they lift their leg to urinate, slide the container into the urine stream from behind or the side. You only need to catch a few seconds of flow — about a tablespoon or two is usually sufficient. Do not touch the container to the dog’s skin or fur. Transfer the urine immediately to a clean, sealable container — your veterinary clinic can provide a sterile specimen cup, or you can use a thoroughly washed glass jar with a tight lid.
For female dogs: The technique is slightly different but no more difficult once you have practiced once or twice. A shallow tray — a disposable aluminum pie plate, a clean plastic takeout container lid, or a purpose-made urine collection tray — works best. Walk your dog on a leash. As she begins to squat, slide the tray underneath her from behind, positioning it to catch the urine stream. Do not push it against her body — just place it where the urine will land. Again, you only need a small amount. Transfer to a clean container immediately.
The Tray Method for Small Dogs and Puppies
Small breed dogs and puppies often urinate quickly, close to the ground, and without much warning. The tray method gives you a larger target area and works especially well for dogs under 15 pounds. Use a clean, shallow plastic tray — the kind sold for puppy potty training, a clean litter box, or a disposable aluminum roasting pan. Place the tray in your dog’s usual potty spot. When they urinate on or over the tray, collect the urine from the tray using a clean syringe, pipette, or by carefully pouring it into a specimen container.
The key with the tray method is cleanliness. The tray must be thoroughly washed with hot water and completely dried before use — no soap residue, no cleaning chemicals, no standing water. Any contaminant in the tray will show up in the urinalysis and may lead to inaccurate results. If your veterinarian suspects a urinary tract infection, contamination is especially problematic because bacteria from the tray can be mistaken for bacteria from the bladder.
This method also works well for dogs who are trained to use pee pads indoors. Place a clean, unscented pee pad upside-down — plastic side up — in your dog’s usual spot. The urine will pool on the plastic rather than absorbing into the pad, and you can collect it from there. This is not ideal for bacterial culture because the pad itself is not sterile, but it is acceptable for a standard urinalysis when no other method is possible.

| Method | Best For | Equipment Needed | Difficulty |
|---|---|---|---|
| Free-catch (ladle / cup) | Male dogs of all sizes | Clean ladle, pie plate, or wide-mouthed cup | Easy |
| Free-catch (shallow tray) | Female dogs of all sizes | Aluminum pie plate, plastic tray, or collection tray | Easy-Moderate |
| Tray method (potty tray) | Small dogs, puppies, indoor-trained dogs | Clean plastic tray or upside-down pee pad | Easy |
| Cystocentesis (vet only) | Sterile sample needed for culture | Performed by veterinarian with needle and syringe | Veterinary procedure |
What Most Owners Get Wrong About Urine Collection
The most common mistake is collecting urine from the ground — grass, concrete, or flooring — rather than catching it directly. A sample that has touched the ground is contaminated with environmental bacteria, dirt, and debris. It is not useful for diagnosing a urinary tract infection and may lead to unnecessary antibiotics or repeat testing. If the urine touches anything before it enters the container, the sample is compromised.
Another frequent error: using a container that is not clean. A jar that previously held food, a container washed with soap that left residue, or a cup that sat in a dusty cabinet can all introduce contaminants. The container does not need to be sterile for a standard urinalysis, but it must be clean — washed with hot water, thoroughly rinsed, and completely dry. Your veterinary clinic can provide a sterile specimen cup at no charge. Accept it. Use it.
A third mistake involves timing. Urine left at room temperature for more than an hour begins to degrade. Bacteria multiply. Cells break down. Crystals form or dissolve. The sample your veterinarian receives no longer represents what was actually in your dog’s bladder. If you cannot deliver the sample within an hour of collection, refrigerate it immediately — not frozen, just cold — and deliver it within 12 hours. Write the collection time on the container so your vet knows exactly how old the sample is.
Storing and Transporting the Sample Correctly
Once you have collected the sample, transfer it to a clean, sealable container immediately. A sterile urine specimen cup from your veterinary clinic is ideal. A thoroughly washed small glass jar with a tight-fitting lid is an acceptable alternative. Do not use containers that previously held food, especially anything containing sugar, which can create false-positive glucose readings.
Label the container with your dog’s name, the date, and the time of collection. If your dog is on any medications, note those as well. Place the sealed container in a clean plastic bag — a Ziploc works well — in case of leaks during transport. Refrigerate the sample immediately if you are not leaving for the clinic within the hour. Do not freeze it. Freezing destroys cells and crystals that your veterinarian needs to evaluate.
When you arrive at the clinic, let the front desk staff know the collection time. A sample collected three hours ago and refrigerated is still useful. A sample collected eight hours ago and left on the kitchen counter is not. Honesty about timing helps your veterinarian interpret the results accurately — and may save your dog from unnecessary repeat testing.

How Puppies, Seniors, and Special Cases Differ
Collecting urine from a puppy is often easier than from an adult dog — but messier. Puppies urinate more frequently, which gives you more opportunities. They also have less bladder control, which means you need to be ready with your container the moment they step outside. The tray method works well for small puppies. Patience and a few practice runs without the pressure of actually needing a sample help both of you get comfortable with the process.
Senior dogs may have arthritis, mobility limitations, or cognitive changes that make positioning difficult. A dog who cannot comfortably squat or lift a leg may need a different approach. For senior females, a very shallow tray that slides easily under a partial squat may work. For senior males who dribble urine rather than producing a strong stream, you may need to catch whatever you can, whenever you can — and let your veterinarian know that the sample may not be a clean mid-stream catch.
Dogs with spinal issues, paralysis, or incontinence present unique challenges. Your veterinarian may recommend cystocentesis as the most practical and diagnostically valuable option. Do not struggle for days trying to catch urine from a dog who cannot urinate normally. Tell your vet about the difficulty. They have solutions — including manual bladder expression in the clinic — that are faster, kinder, and more effective than endless at-home attempts.

Frequently Asked Questions About Dog Urine Collection
Use a shallow, clean container — an aluminum pie plate, a plastic takeout lid, or a purpose-made urine collection tray. Walk your dog on a leash. As she squats to urinate, slide the tray underneath her from behind to catch the urine stream mid-flow. Transfer the sample immediately to a clean, sealable container and refrigerate if not delivering to the vet within an hour.
Most veterinarians need only a tablespoon or two — about 5 to 10 milliliters — for a standard urinalysis. More is always better than less, but do not stress about filling the container. Even a small amount, if collected cleanly, provides valuable diagnostic information. If a bacterial culture is needed, the vet may request a slightly larger volume.
No. Urine that has touched grass, concrete, carpet, or any surface is contaminated with environmental bacteria and debris. This can cause false-positive results for infection and may lead to misdiagnosis. The sample must be caught directly in a clean container as your dog urinates — not scooped from the ground afterward.
Deliver the sample to your veterinarian within one hour if kept at room temperature. If a longer delay is unavoidable, refrigerate the sample immediately and deliver it within 12 hours. Never freeze a urine sample. Write the collection time on the container. Refrigerated samples may form crystals that were not present at body temperature — your veterinarian will account for this.
Try taking your dog out first thing in the morning when their bladder is full. Walk them in their usual potty spot on a leash. If they seem nervous about the container, practice walking with it for a few days before the actual collection. If you are still struggling, ask your veterinary clinic if they can collect the sample — many clinics can keep your dog for a brief period and collect urine during a walk or via cystocentesis.
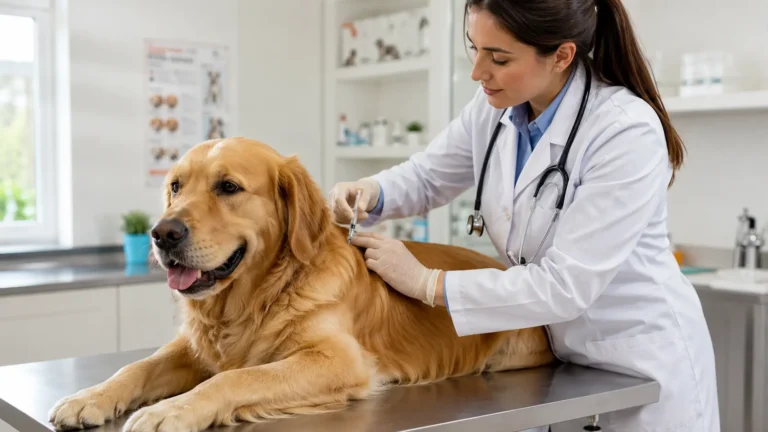
Cystocentesis is a procedure where a veterinarian inserts a very fine needle through the abdominal wall directly into the bladder to collect a sterile urine sample. It is guided by palpation or ultrasound, takes only seconds, and causes minimal discomfort — similar to a blood draw or vaccination. It provides the most accurate sample for bacterial culture and is the gold standard when a urinary tract infection is suspected.
Yes, if it is thoroughly clean. Wash a small glass jar with hot water, rinse completely to remove any residue, and let it dry fully before use. Do not use containers that previously held food, especially anything containing sugar. The best option is a sterile specimen cup from your veterinary clinic — they are free and designed specifically for this purpose.
- The free-catch method using a clean soup ladle, shallow tray, or aluminum pie plate is the easiest and most common way to collect a urine sample from your dog at home.
- Collect the sample mid-stream — skip the first and last drops. Transfer immediately to a clean, sealable container and refrigerate if not delivered to the vet within one hour.
- Never collect urine from grass, concrete, carpet, or any surface. Contaminated samples produce inaccurate results and may lead to misdiagnosis or unnecessary antibiotics.
- The first morning sample is ideal because it is the most concentrated and gives your veterinarian the most diagnostic information.
- If your dog is straining to urinate, producing bloody urine, or seems to be in pain, do not delay — go to the veterinarian immediately. A sterile sample via cystocentesis may be needed.
- Practice the collection technique before you actually need a sample. Desensitizing your dog to the container makes the real collection quick, calm, and successful.